
I would like to create a SharePoint Framework with Bot Framework and Language Understanding Intelligent Service (LUIS). The idea is that the solution should manage some issues using web chat. For example: Create task or meeting.
For some steps you need some preparations:
- Create a bot (dev.botframework.com)
- Create a cognitive services account (portal.azure.com)
- Create a LUIS application (www.luis.ai)
- Download the SharePoint Framework web parts (github.com/SharePoint/sp-dev-fx-webparts)
There is already a web part with Bot Framework, so you don’t need to develop the web part for connection to Bot Framework. You only need to write the code for adding the items to the task list and other items to the calendar list. What I want to show here, is how you will get the data from bot framework to create an item.
Create a bot
- Go to bot framework (https://dev.botframework.com)
- Click Register a bot and enter some data
- Create a Microsoft app id and a password (you will need it later for LUIS)
- Keep empty for the field messaging endpoint (you will add it then from LUIS)
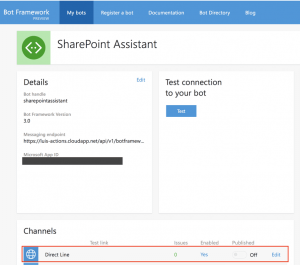
- After adding the new bot, go to “My Bots” and select it
- Enable the channel “Direct Line”
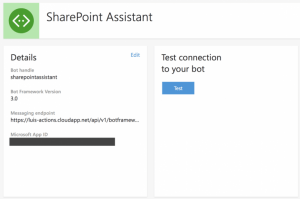
The result should look like this one:
Create cognitive services account
For using LUIS application, you need cognitive services account from Microsoft Azure.
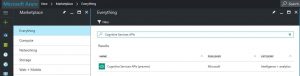
1. Go to Portal Azure (portal.azure.com)
2. Select “New” and add “Cognitive Services APIs”
3. Select “Cognitive Services APIs”
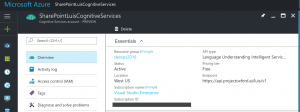
4. Create and enter some data
5. Select API type “Language Understanding Intelligent Service”
6. Create it
7. Copy the “Subscription ID” for LUIS
Create a LUIS application
For this step, you will create and train it for task
1. Go to LUIS (www.luis.ai)
2. Go to My Settings on the right side
3. Go to “Subscription Keys”
4. Enter the key from the Azure Portal
5. Then go back to “My applications”
6. Create new application
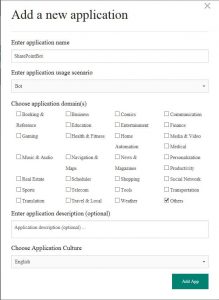
7. Add an intent “CreateTask” for example “Create task”
8. Add two entities “Topic” and “User” (Please read more for LUIS – Help Docs)
9. Train it like “Create task ‘Check code’ for Tom”

10. Select intent “CreateTask”
11. Add an action and enter data like as this picture below
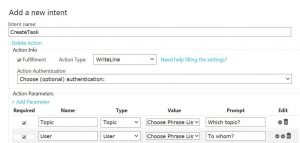
You need it for using Bot Framework. At the moment this is not the best solution for handling SharePoint framework, but this is easy for learning. I prefer to use the action type “JsonType”, maybe I will make a new blog for this. You see the text Task#?{Topic}#?{User}. The sign “#?” is used for split later in the code. The task is the category. So then I will also use Calendar. {Topic} and {User} are token and will be placed by LUIS.
12. Save it.
13. Go to App Settings
14. Select endpoint key
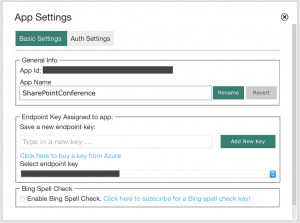
15. Close it
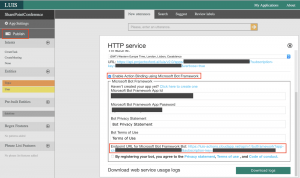
16. Click “Publish”
17. Enable “Action Binding using Microsoft Bot Framework”
18. Add data from Bot Framework App
19. Copy the endpoint URL for Microsoft Bot Framework Bot
Configure and test bot with LUIS
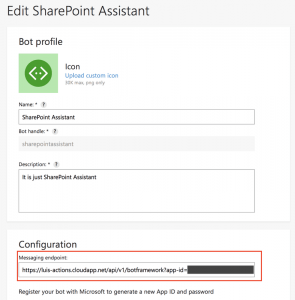
So now back to bot framework
1. Go to Bot Framework dev.botframework.com
2. Select “My bots” and bot
3. Go to edit bot
4. Paste the URL from LUIS in Messaging endpoint
So now you can start to test it.
1. Test connection to your bot

Next step is chat test.
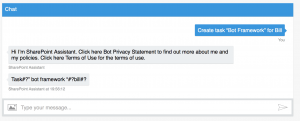
Yeah, it works. It is a task, and the topic is “Bot Framework”, and the user is “Bill”. So now we can use it for SharePoint Framework.
Download and run SharePoint Framework
1. Go to github and download the solution “react-bot-framework” github.com/SharePoint/sp-dev-fx-webparts/tree/master/samples/react-bot-framework
If you work first time with the SharePoint Framework, you can see more information here dev.office.com/sharepoint/docs/spfx/set-up-your-development-environment
2. If you download all SharePoint Framework Web parts, go to folder “sp-dev-fx-webparts/samples”, copy the folder “react-bot-framework”, and paste with a new name of this folder like “react-bot-framework”.
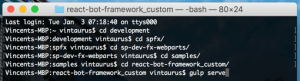
3. Start it with gulp serve
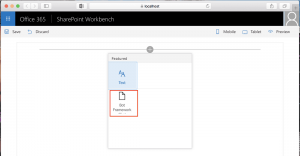
4. SharePoint Page is displayed and add the webpart
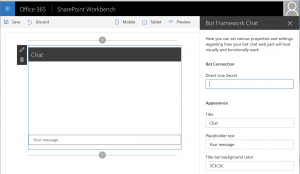
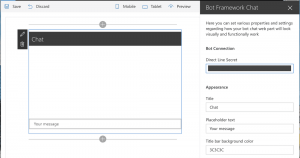
5. Configure the web part
You have to add the key for connection to bot framework
6. Go to bot framework dev.botframework.com
7. Select bot and go to the channel
8. Click “edit”
9. Copy the first secret key from bot framework
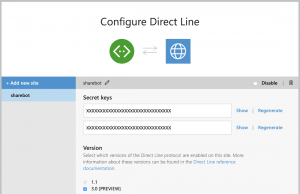
10. Add the secret key to field “Direct Line Secret ” and close it
11. Add your message like and you can see the result like here
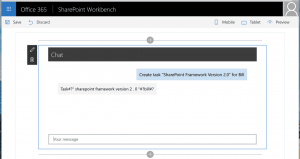
So you see, it works. Now you can develop web part solution further to catch this message and create a new element and create a message like “The task is created. What else can I do?” and send it to this web part.