The PowerApps is an excellent and useful Custom Business Apps. I’m a passionate developer and consultant. First, I always check, if the requirement is required for development, buy an exiting tool or use custom business apps. In this case, I decided to use with PowerApps. The PowerApps is useful for some cases, and it can be created very fast.
In this case, I miss a modal dialog function in PowerApps for example “Help information”.
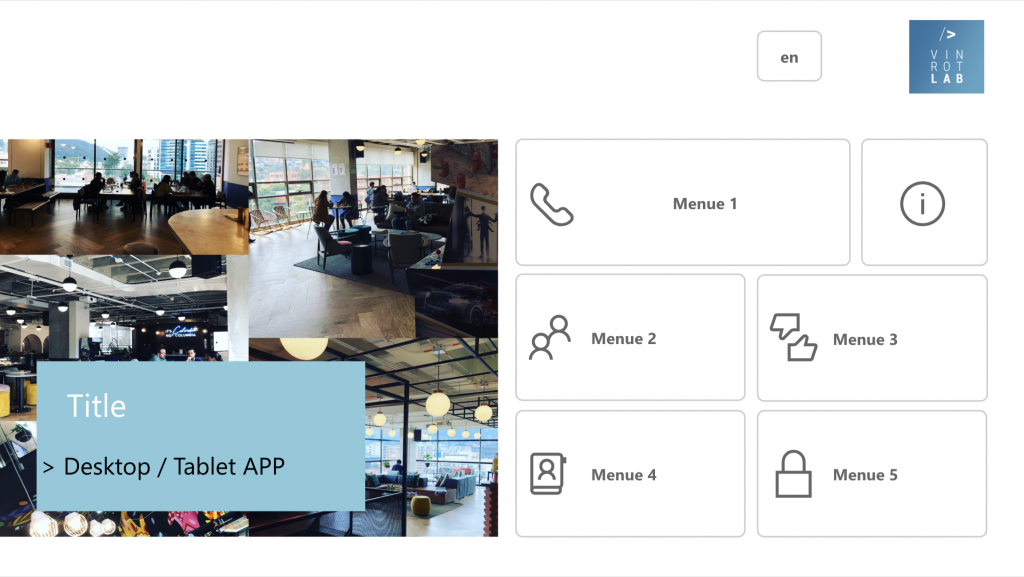
My goal is for the PowerApps to be very user-friendly.
How to do:
- Create first the landing screen. I called it “scrLanding”
- Duplicate this landing screen and enter the name “scrHelp”
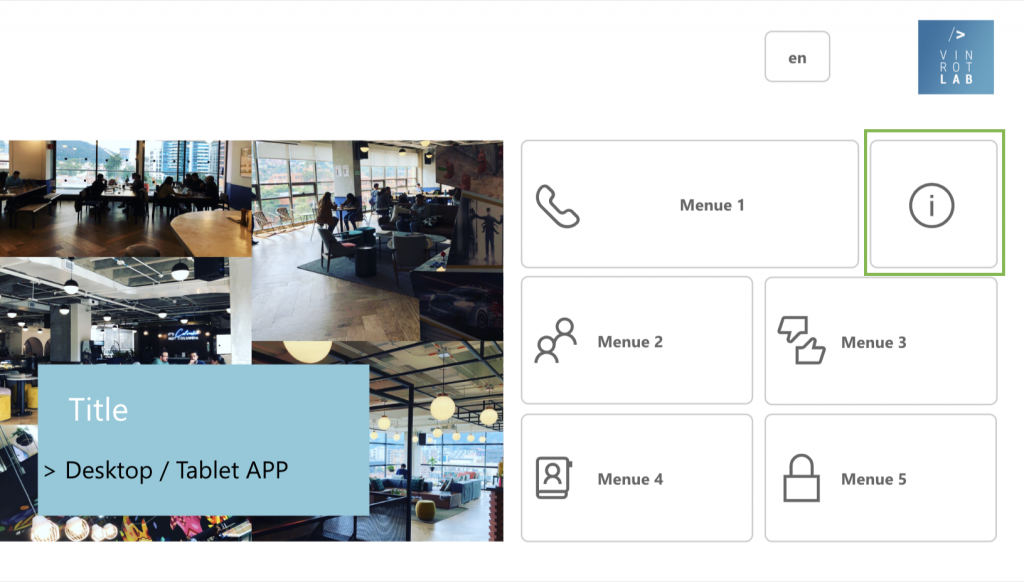
- Go back to the landing screen and add the value in the field of OnSelect «Navigate(scrHelp, ScreenTransition.Fade)» on the right side.
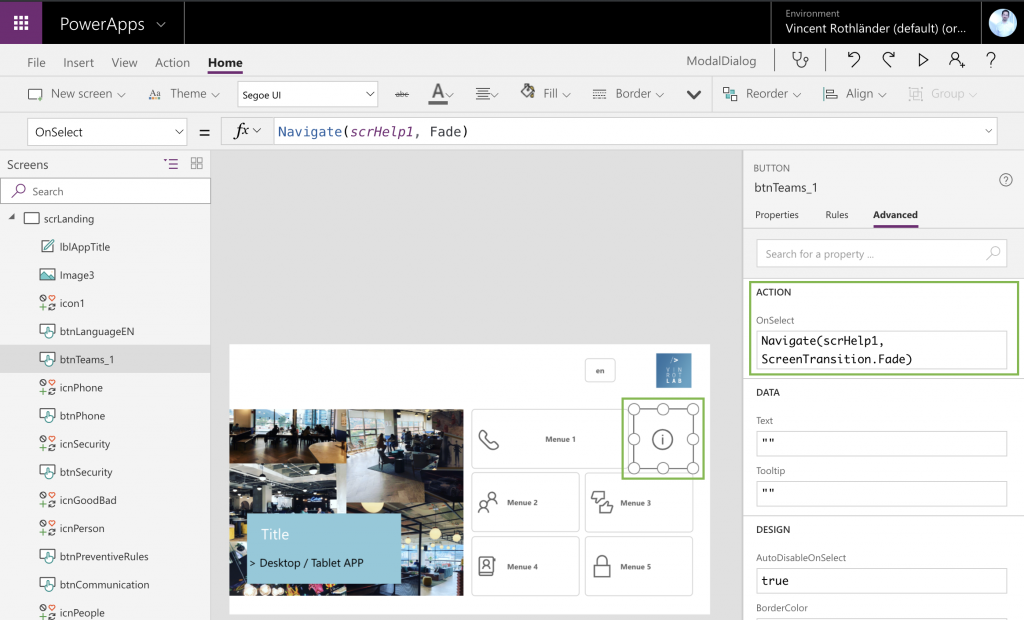
- Go to another screen “scrHelp”
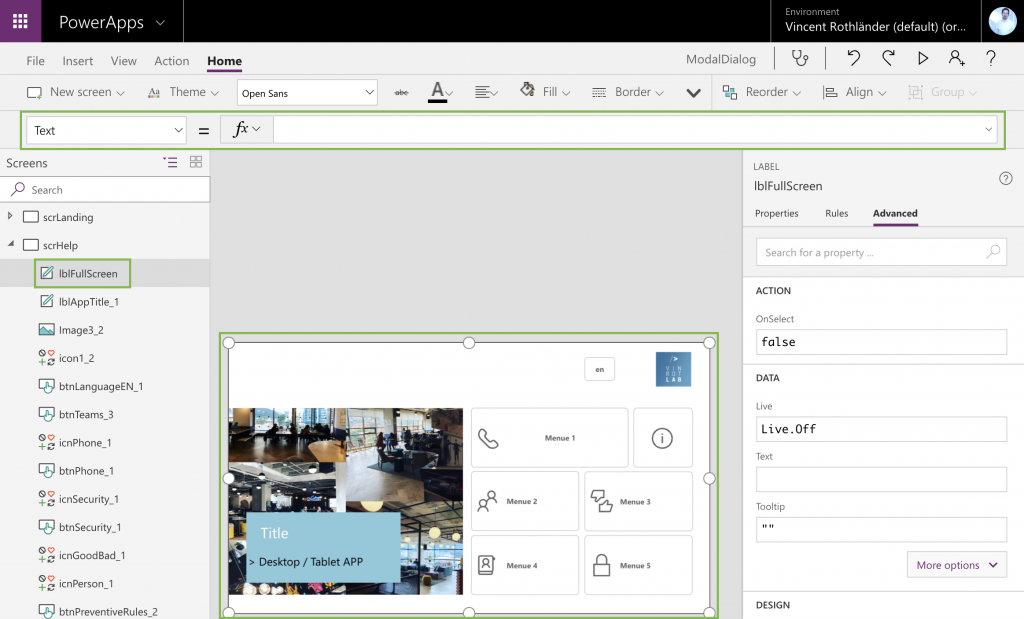
- Insert Label and make it to full screen
- Change the Label name to “lblFullScreen
- Empty the Text
- Go to Properties on the right side, click Color and select color “Grey” or similar.
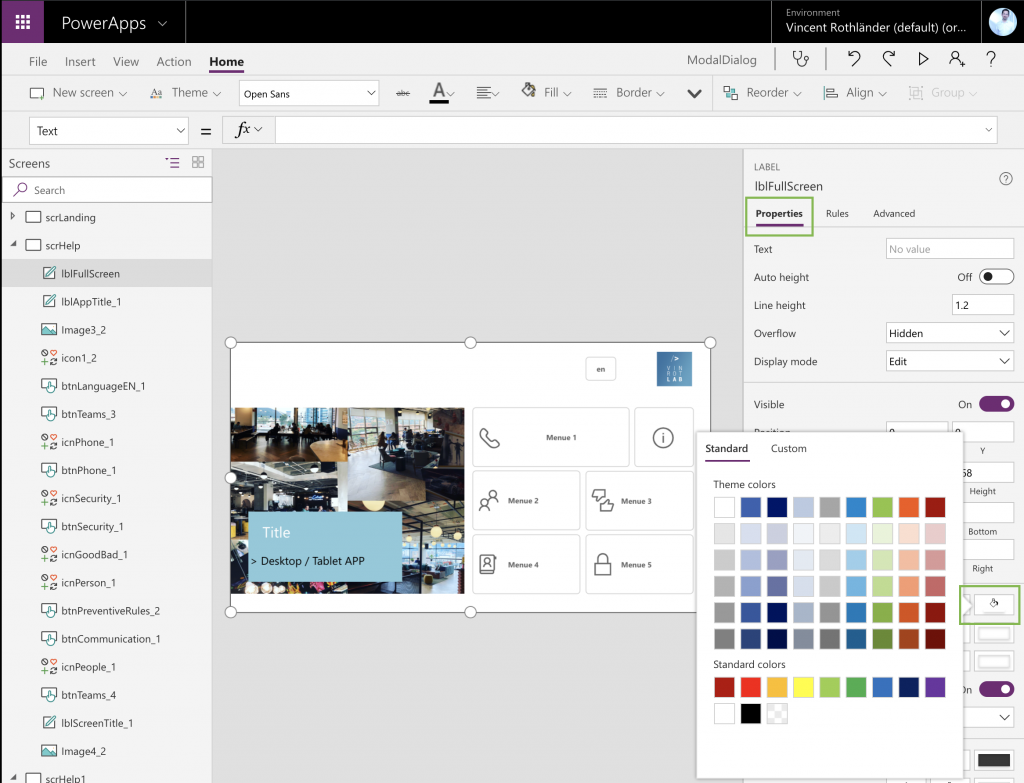
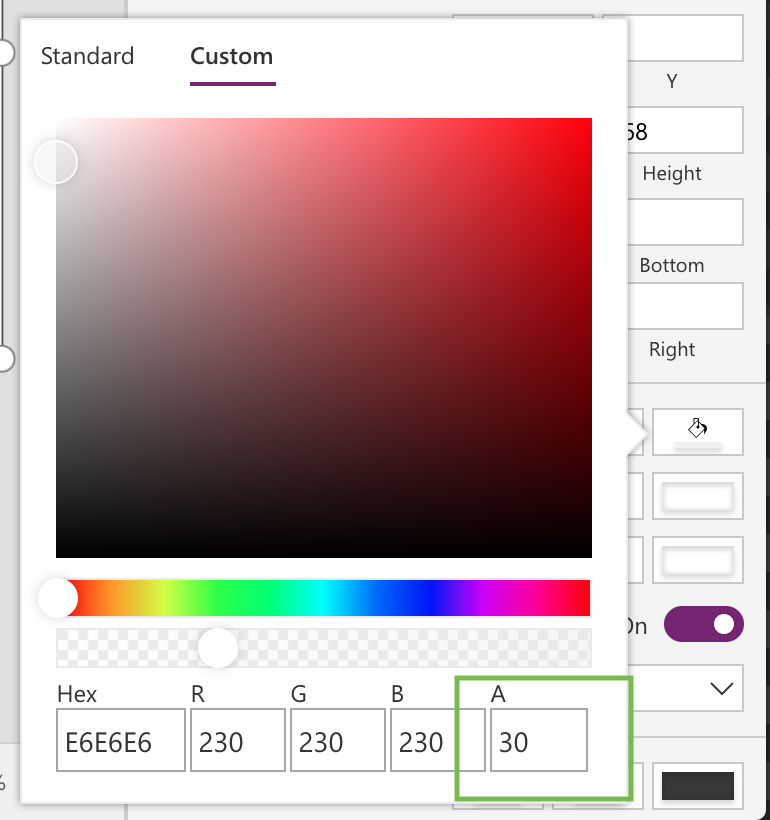
- Go to Custom and enter the value «30» in the field A
- Insert the Label again and change the name “lblModalDialog”
- Add text in the field Text
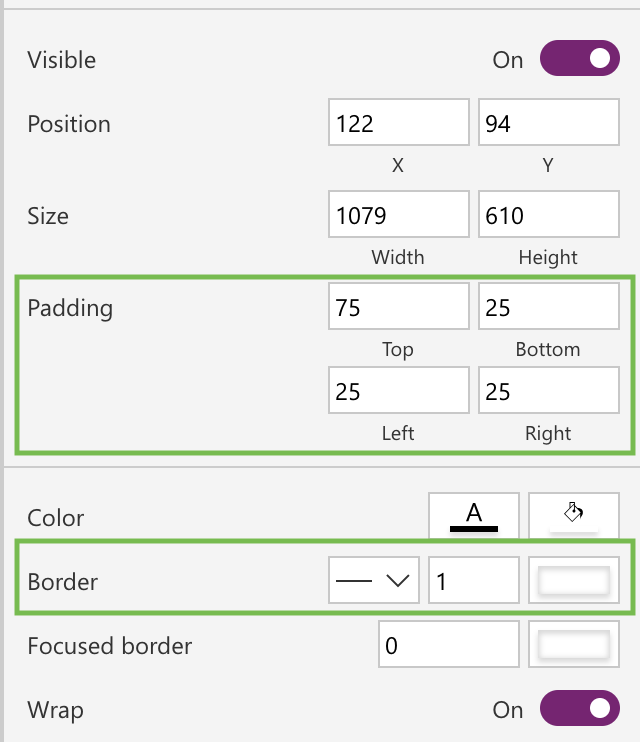
- Go to the right side and add some values to Padding and Border
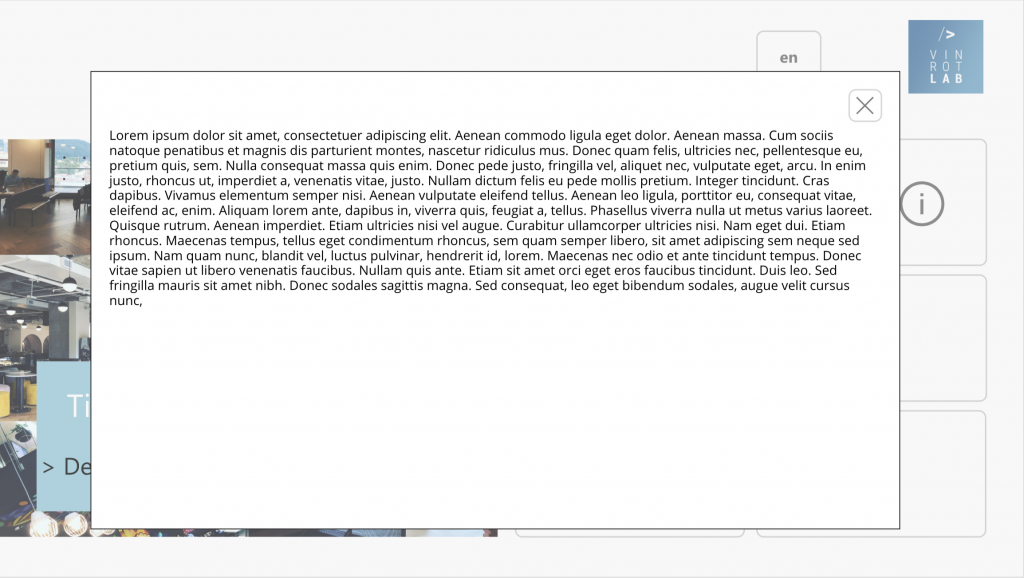
Now it looks like Modal Dialog. I also added Cancel-Button, so the user recognizes, this is a modal dialog.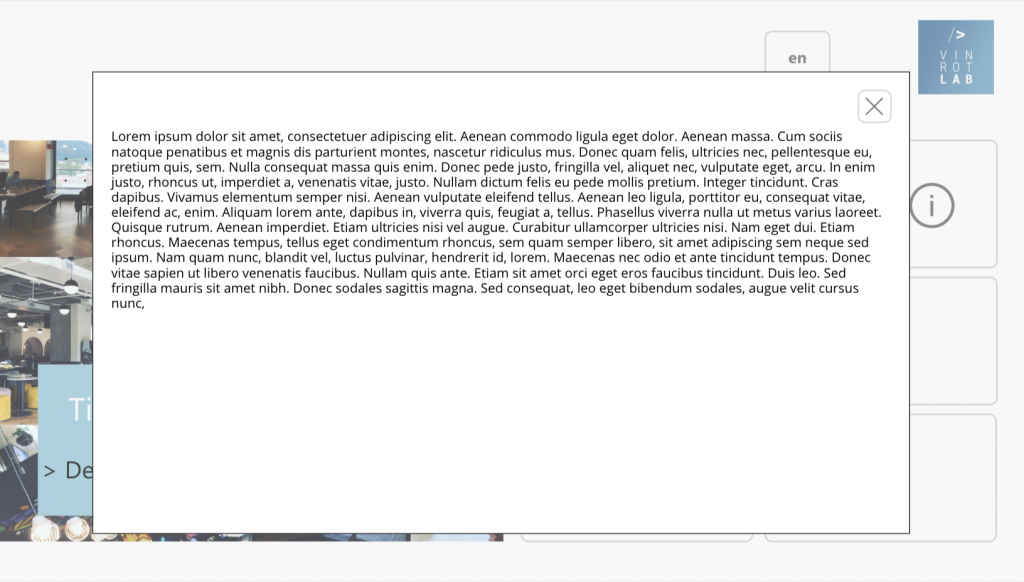
- Insert Button and change some properties on the right side:
- Color: White
- Adapt the Size
- Add Icon “Cancel” to the button
- Select Label “lblFullScreen” and go to Advanced
- Enter the text to the field OnSelect “Navigate(srcLanding, ScreenTransition.Fade)”
- Repeat it for “lblModalDialog” and “btnCancel”
Now the modal dialog is created. The user can press somewhere on the screen, and it goes back to the landing screen. Is this not awesome? However, don’t forget it, if you change anything on the screen “scrLanding”, so maybe you have also adapted it on screen “scrHelp”.
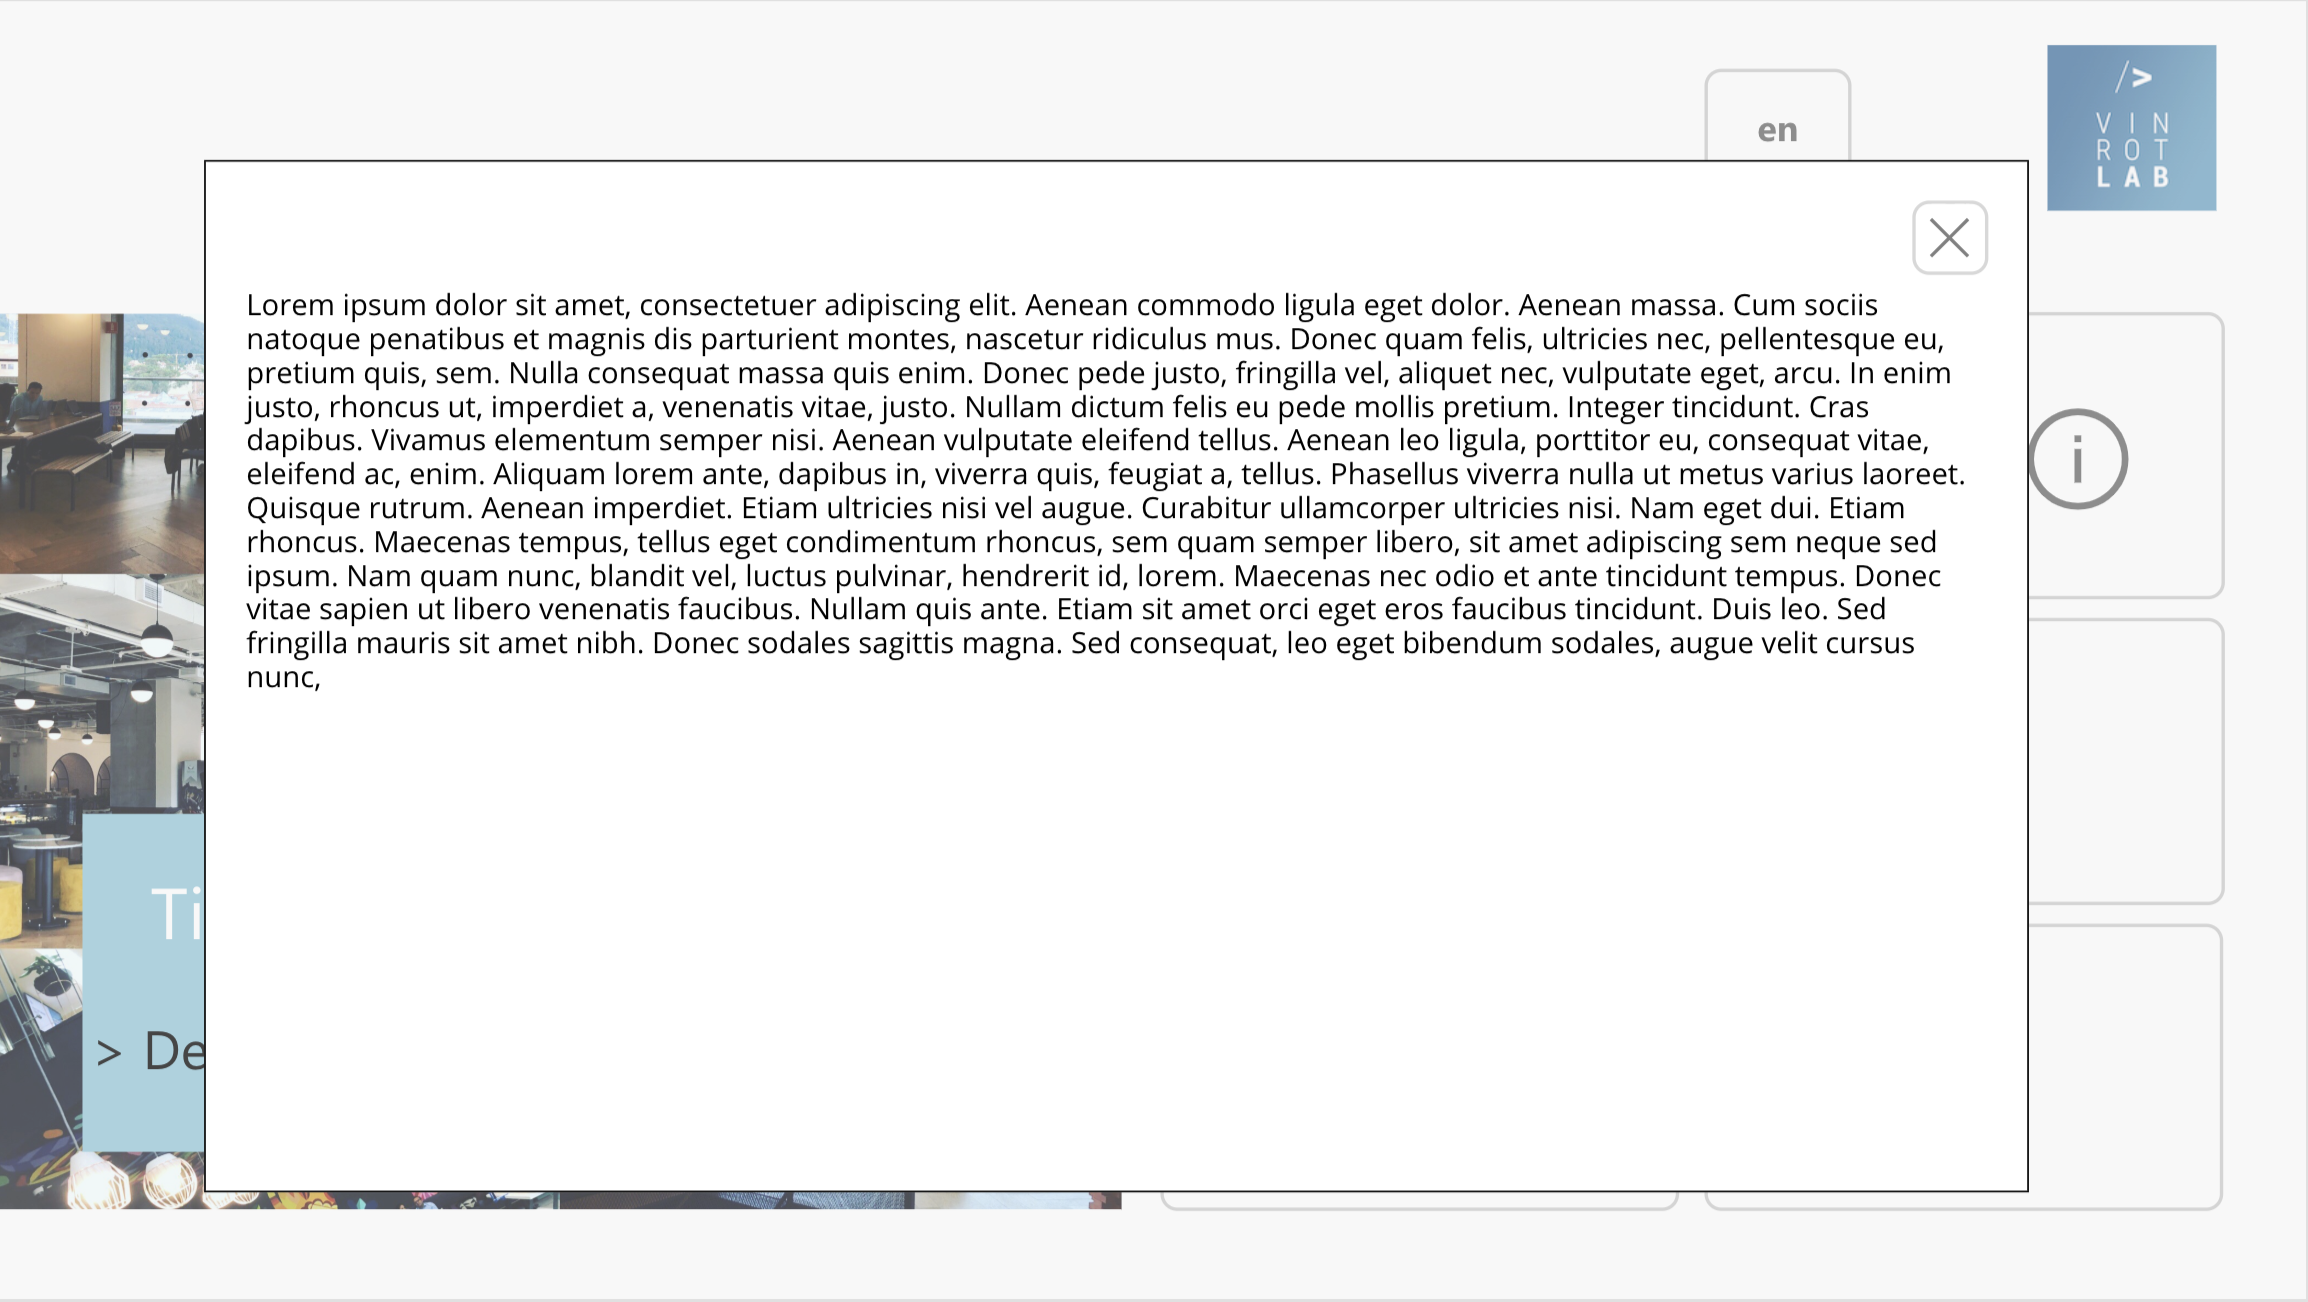
Here is the result: