It’s a small project with SharePoint Framework and Azure DevOps. It displays a chart web part for the different bank accounts. This solution is installed on Office 365. Since I work with Office 365, why not use with Azure DevOps? I’m not Azure DevOps Expert, so it is time to get to know this great solution. I just found out that there is no description or the old description on the Internet. The last what I found is here: Continuous integration and deployment for your SharePoint Framework solutions. (https://delucagiuliano.com/continuous-integration-and-deployment-for-your-sharepoint-framework-solutions/#.XHPZz5P0nUL) This article from Giuliano De Luca was created on October 22, 2017, but this is a good start to reuse some tasks for a new build definition. Please download the PowerShell-scripts from this article. (GitHub from Giuliano De Luca: https://github.com/giuleon/AutomatedDeploymentForSPFx – Thank you very much, Giuliano!) You will need it for Azure DevOps.
My goal is, I update some in the SPFx solution and check in this code to Azure Repos – Git-Repositories. Azure DevOps should build this solution, send it to SharePoint Catalog library and update it on the selected site. The great thing about it is, I can see the result right away in SharePoint.
1. Preparation
Download PowerShell-scripts
Download both PowerShell-scripts from the article Continuous integration and deployment for your SharePoint Framework solutions. These are in GitHub (https://github.com/giuleon/AutomatedDeploymentForSPFx).
Also download my PowerShell-script: GitHub (https://github.com/Vintaurus/ci_spfx_azure_devops).
Add these three scripts to the root folder in your solution (Visual Studio Code or Visual Studio).
Add SPFx solution to SharePoint app catalog
Before I use with Azure DevOps, I added the SPFx solution manually in SharePoint catalog. Of course, the best solution is, the Azure DevOps should take all my tasks. But in this case, it is a small solution.
Add SPFx web part to a SharePoint site
So after successful deployment in SharePoint catalog, you can add the app in SharePoint site and place it to the site.
Get exiting SPFx web part – app id
For the build definition, you need an app id from SPFx web part. You can get it with the Azure CLI (or PowerShell).

Create a project in Azure DevOps and add a solution to Azure Repos
I won’t describe here precisely, how you can do it. You can find the information on the Internet. I used this configuration:
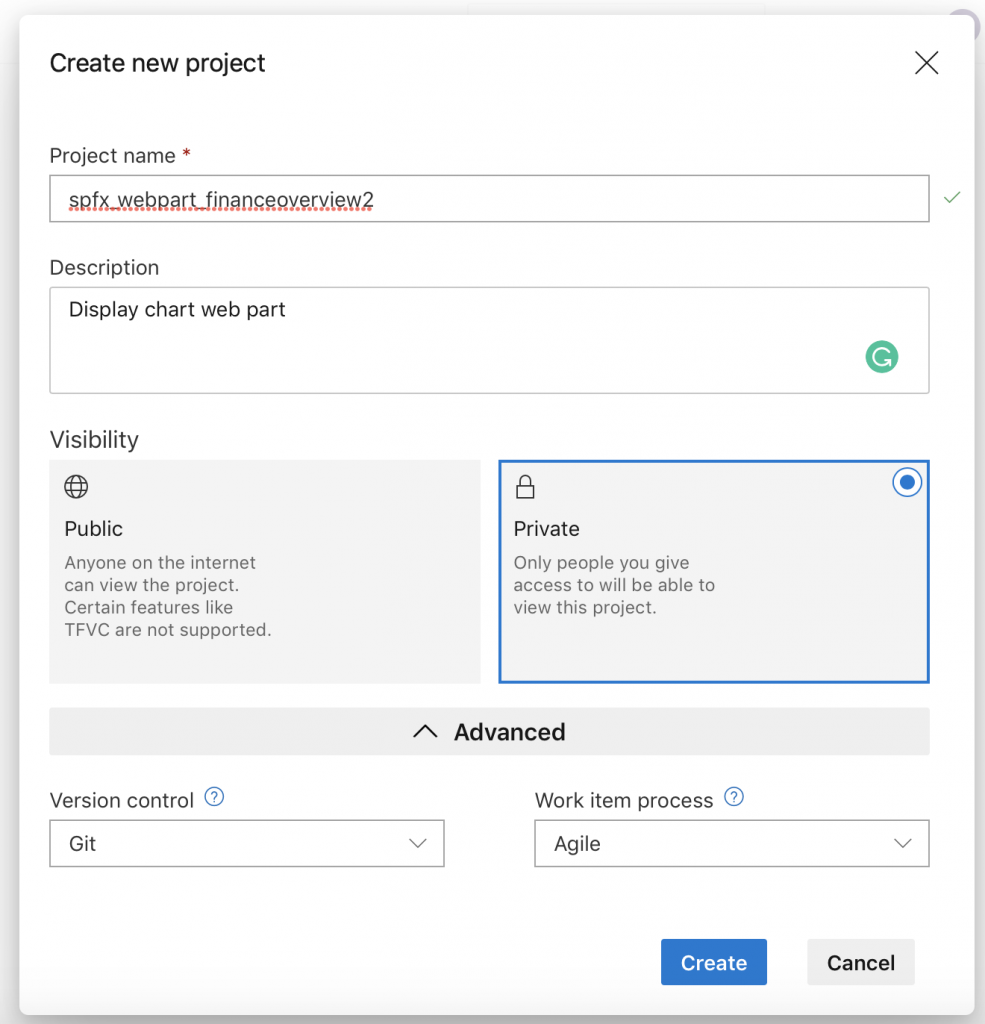
After that, I check in the solution from Visual Studio Code in Azure Repos.
2. Create pipeline in Azure DevOps
Now it’s finally really off to create a release in Azure DevOps.
1. Go to Pipelines, select Releases and click «New pipeline»:

2. Select «Empty job»:
![]()
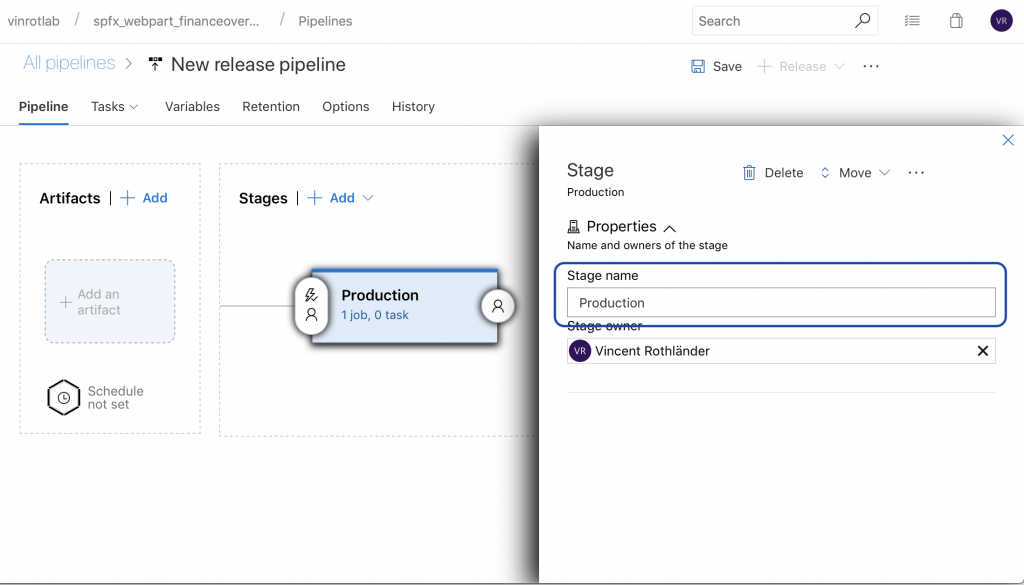
3. Enter the stage name:
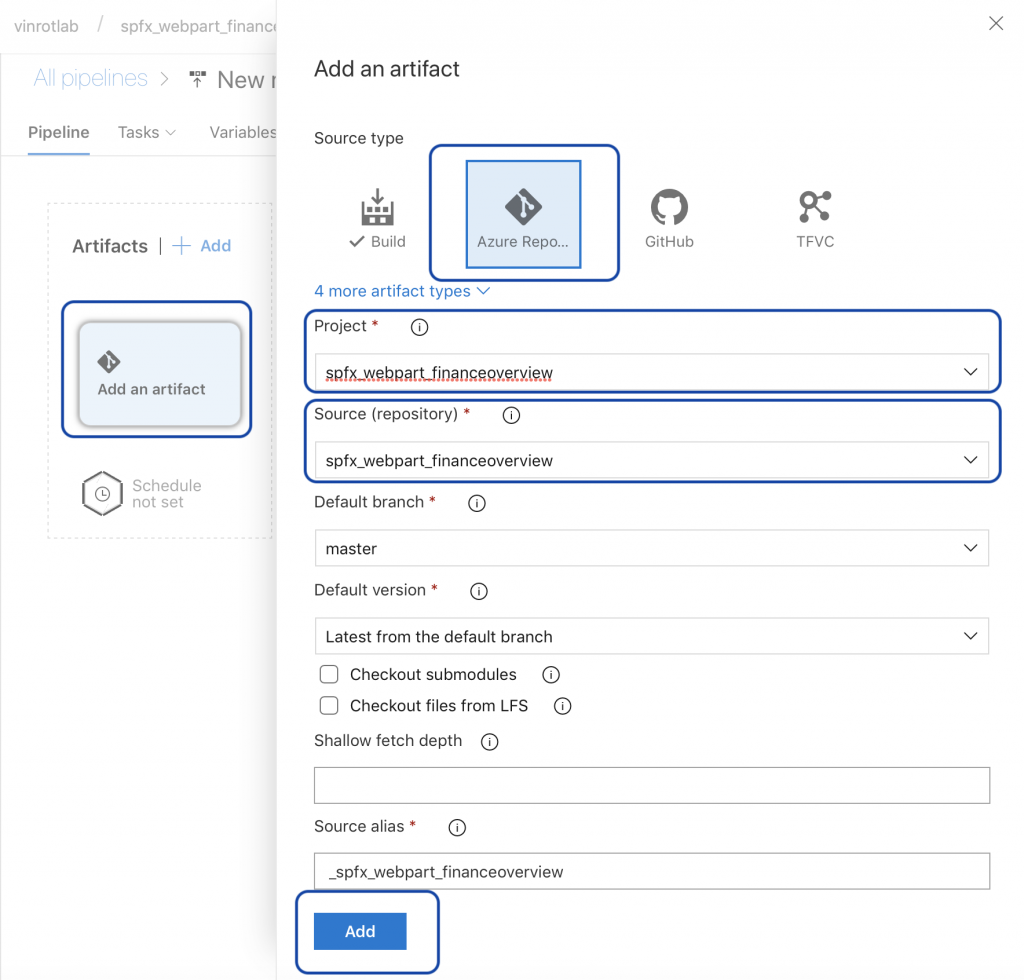
4. Click on «Add an artifact», select source type «Azure Repos», select project and source, click «Add»:
5. Click an icon «continuous deployment trigger» and enable the «Continuous deployment trigger»:
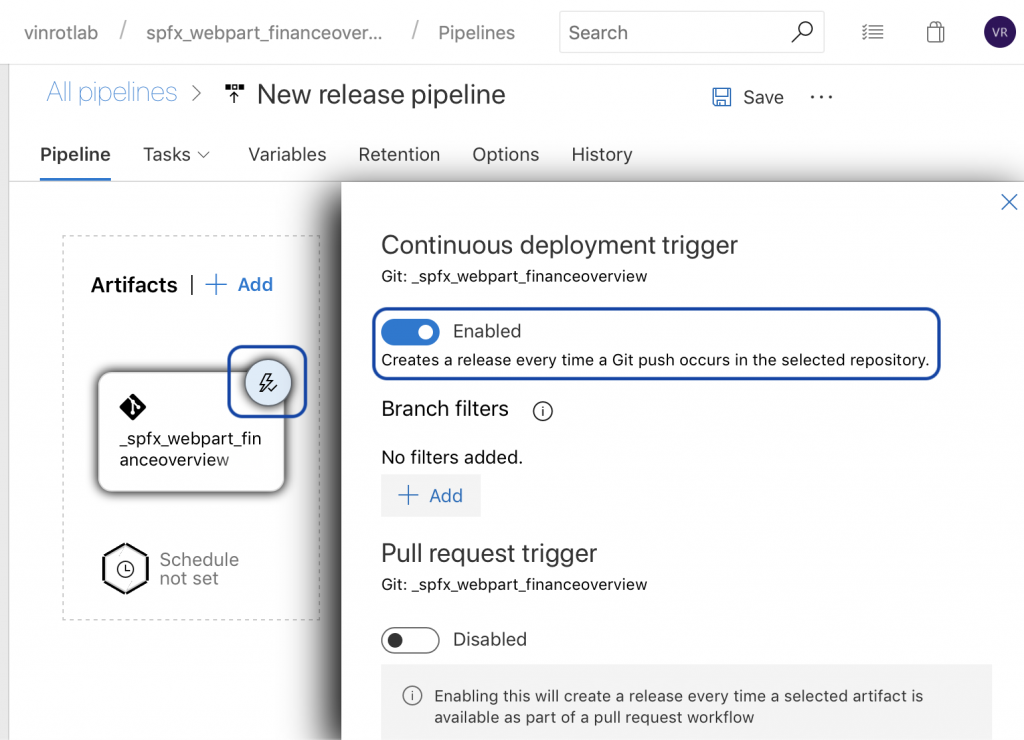
Now the configuration for an artifact is done. The next step is to add some tasks in the stage.
6. Go to stage «Production» and click on «1 job, 0 task»: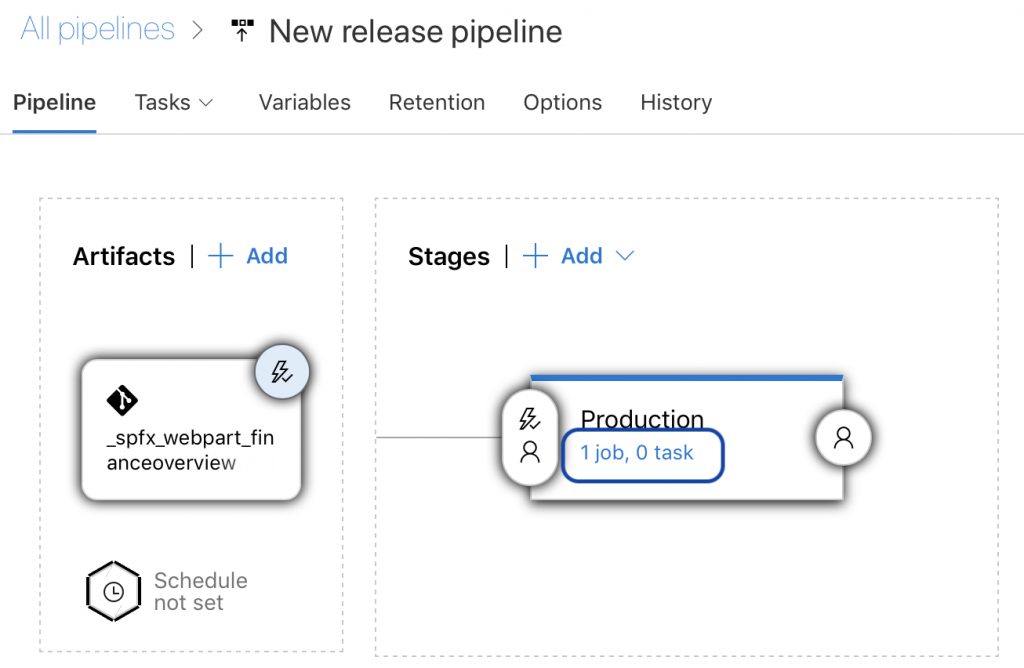
7. Click on «Agent job» and change the agent pool to «Hosted»:
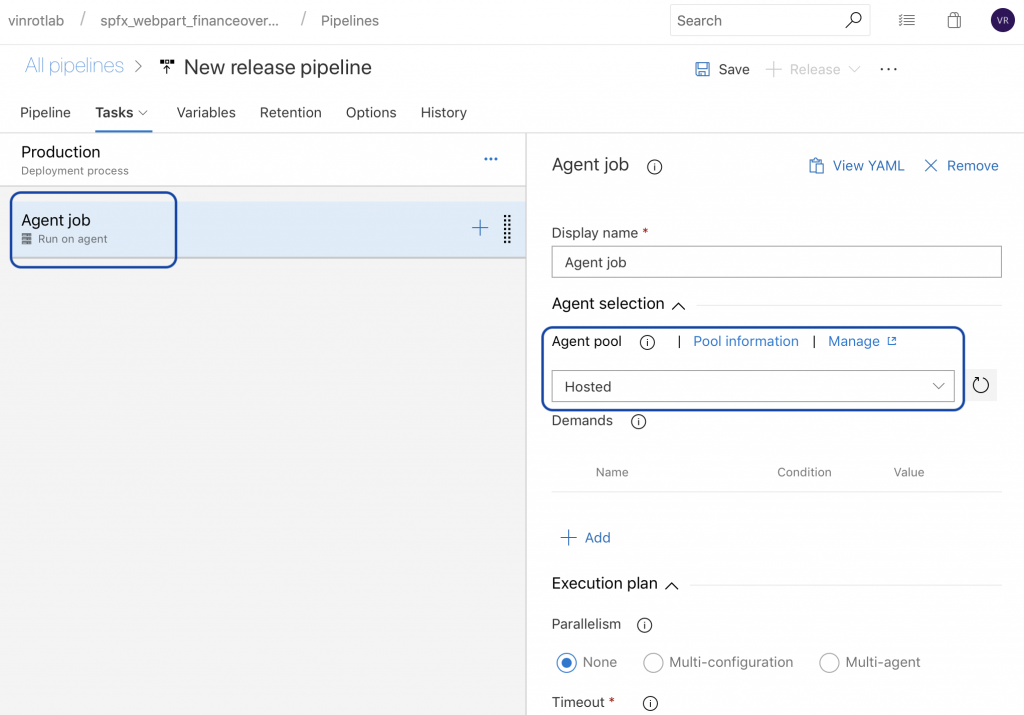
If you want, you can save it now.
8. Add 10 tasks to the agent job:
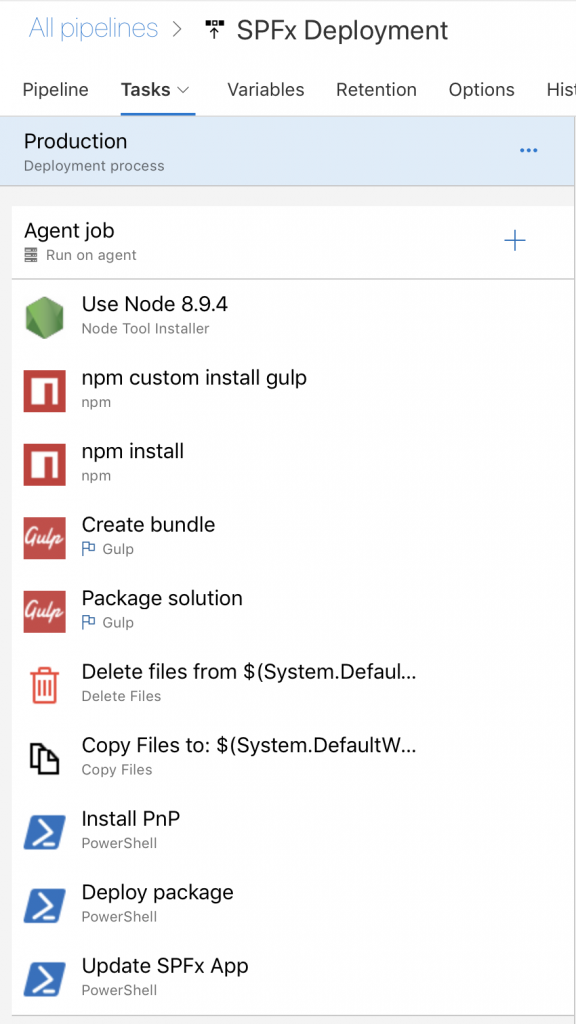
For the next steps for the tasks, I will mostly add the only screenshot without comment:
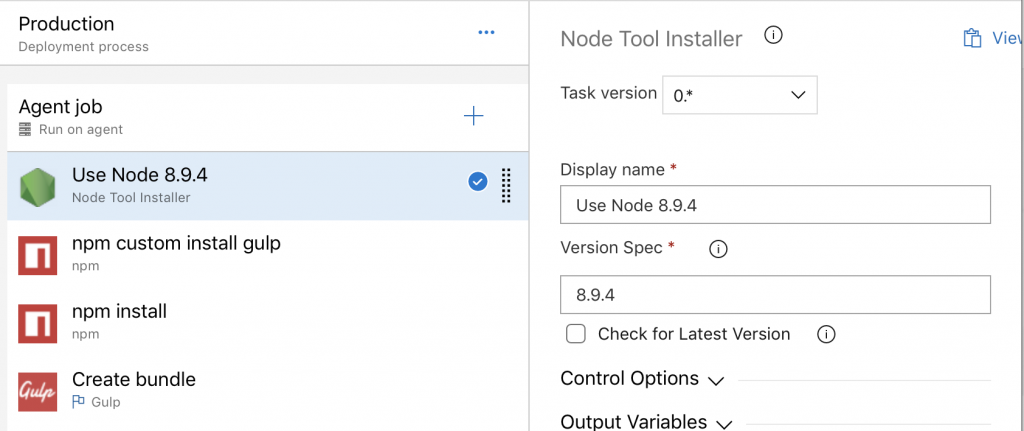
9. Task «Node Tool Installer»:
You will need it because the SPFx solution requires a certain version of node.js.
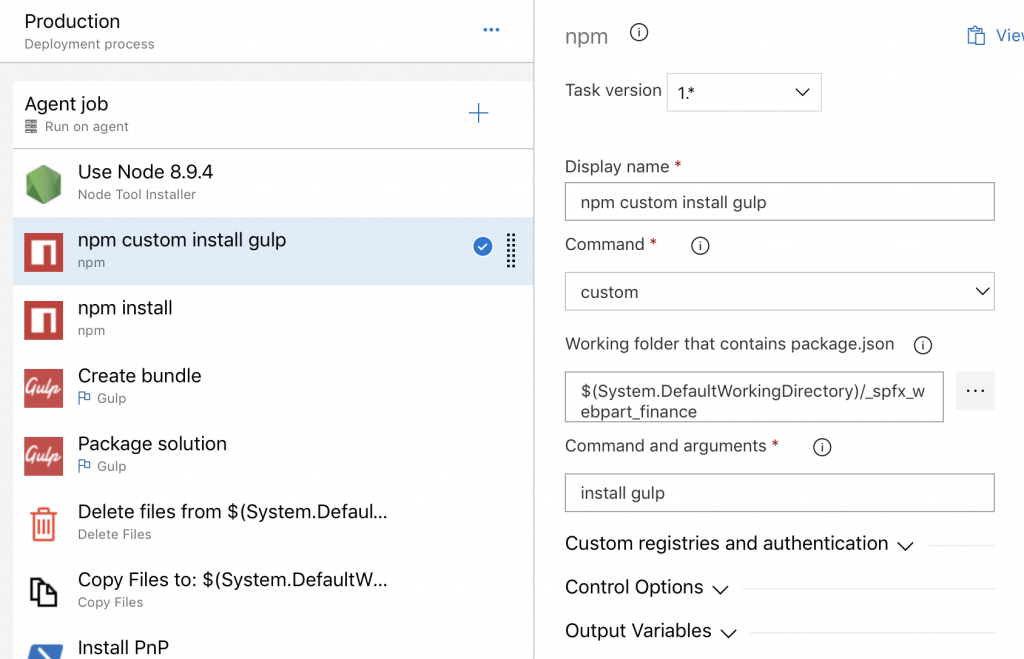
10. Task «npm» – npm custom install gulp:
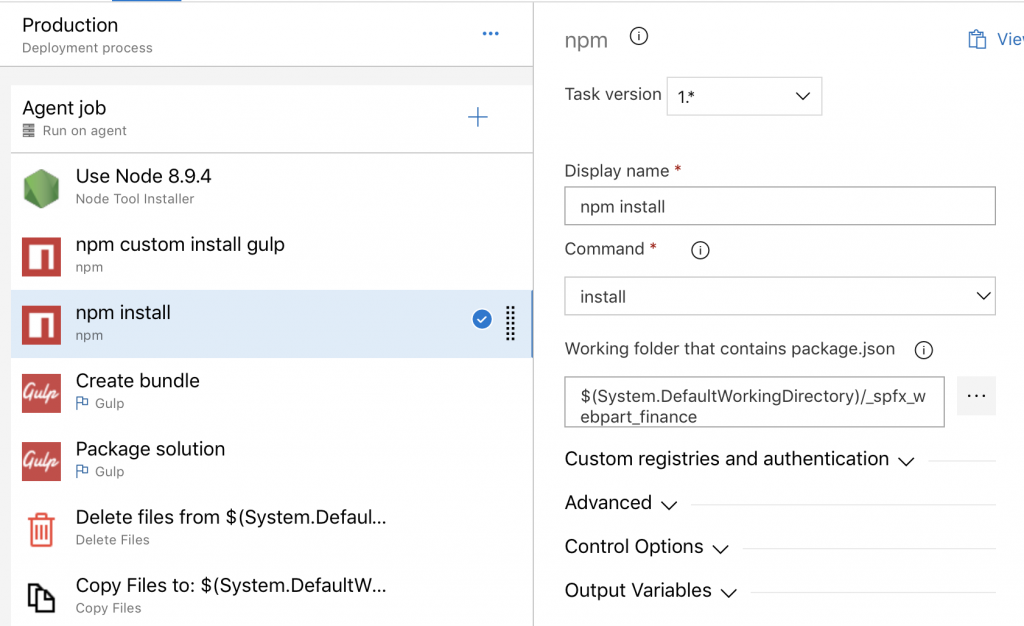
11. Task «npm» – npm install:
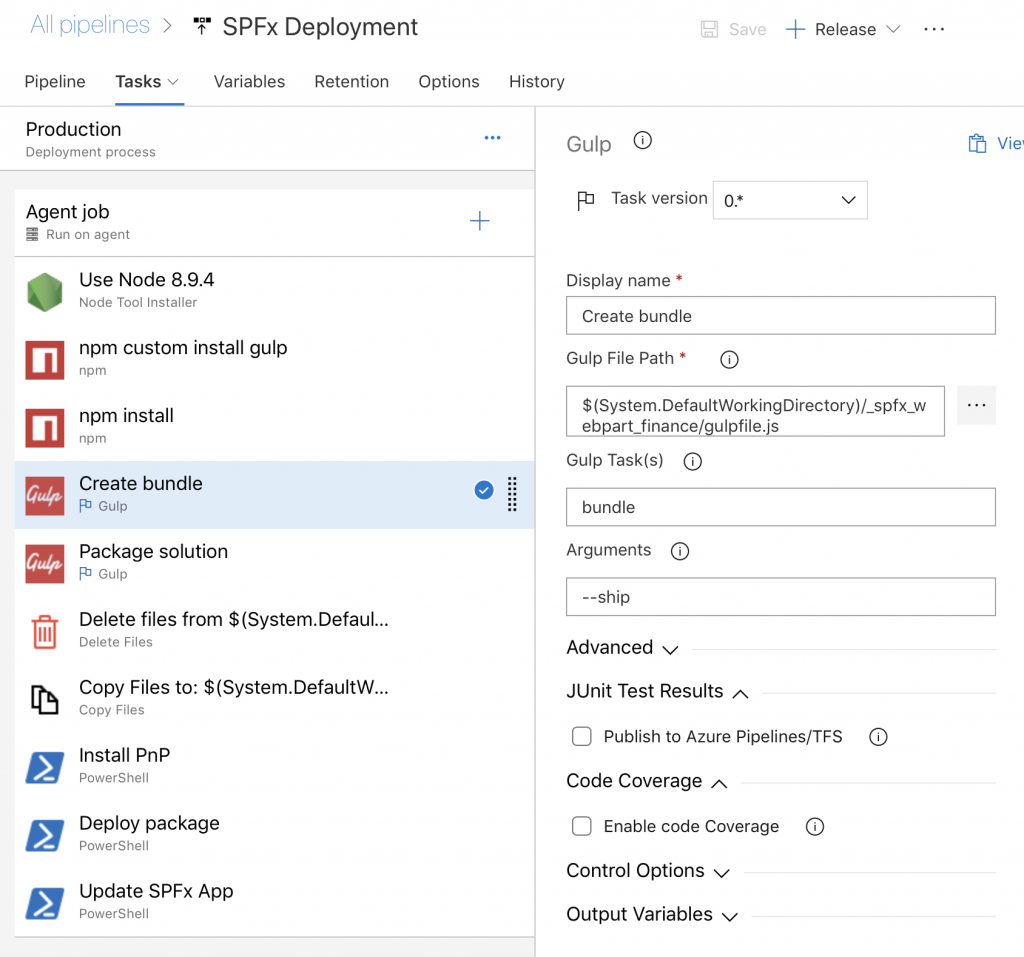
12. Task «Gulp» – Create bundle:
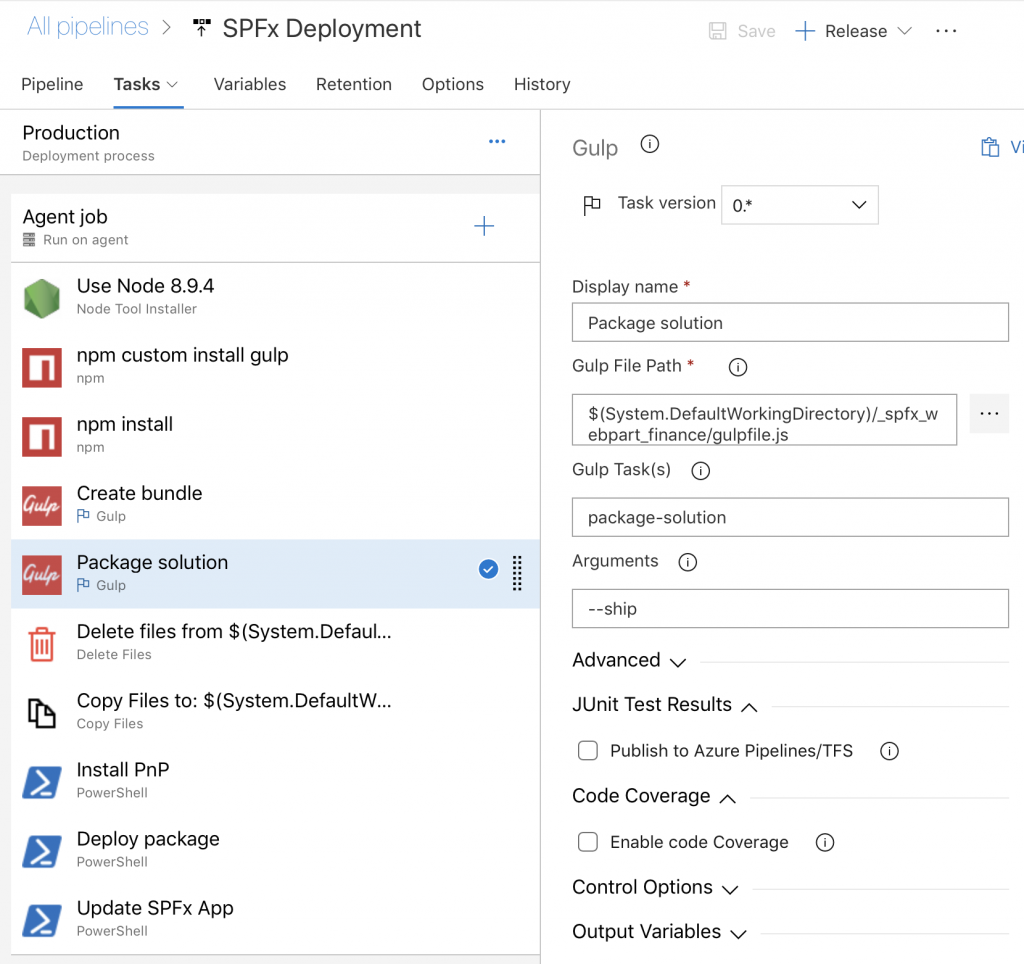
13. Task «Gulp» – Package solution:
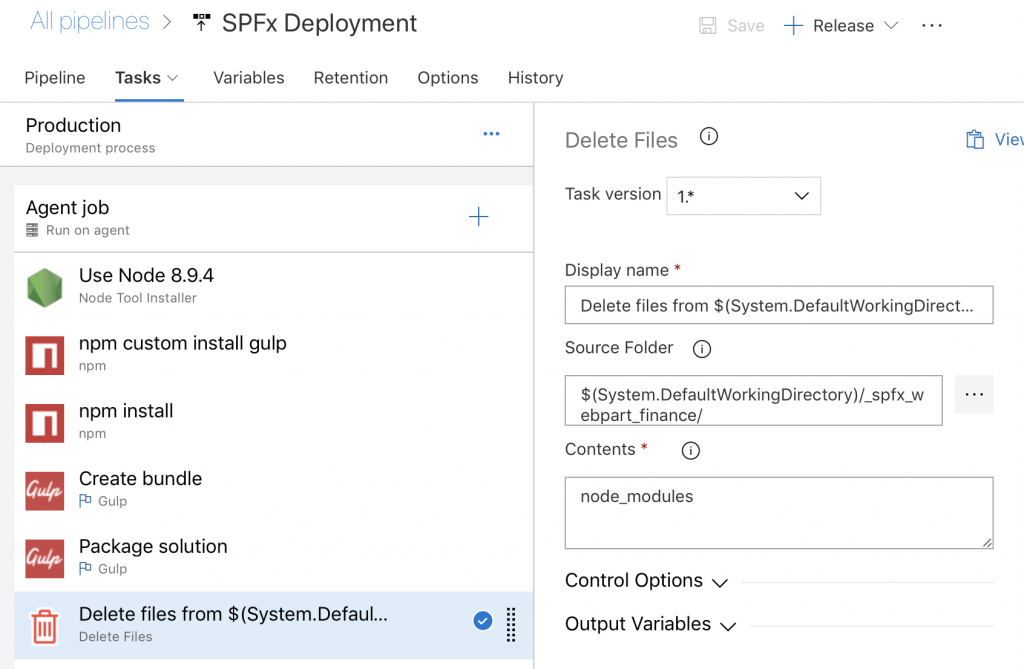
14. Task «Delete Files»:
Before the files should copy to another folder, the folder «node_modules» should be deleted.
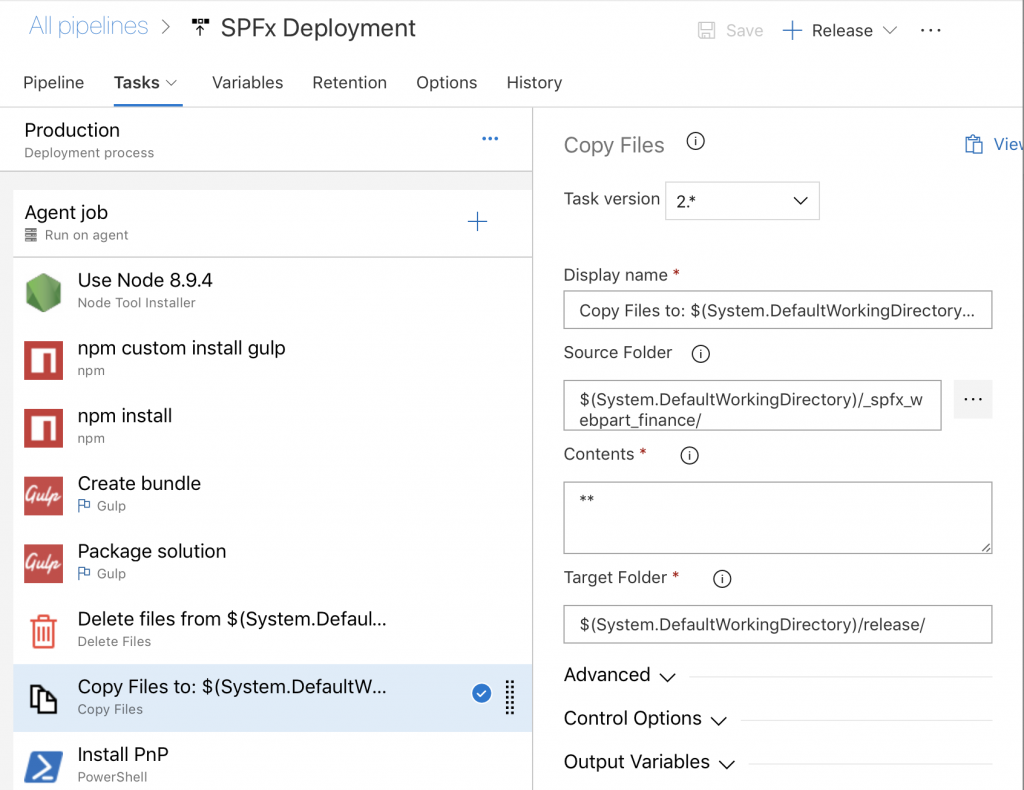
15. Task «Copy files»:
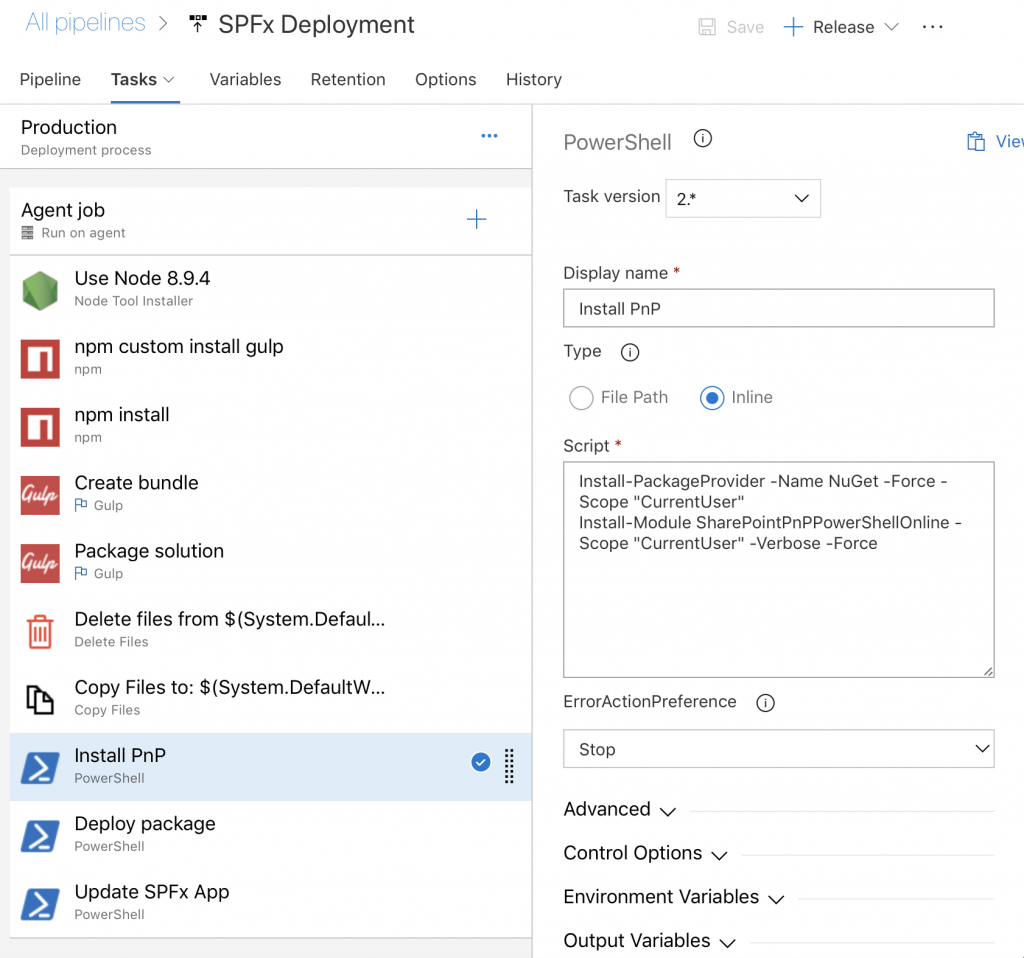
16. Task «PowerShell» – Install PnP:
Copy this code and add in the script:
Install-PackageProvider -Name NuGet -Force -Scope "CurrentUser"
Install-Module SharePointPnPPowerShellOnline -Scope "CurrentUser" -Verbose -Force
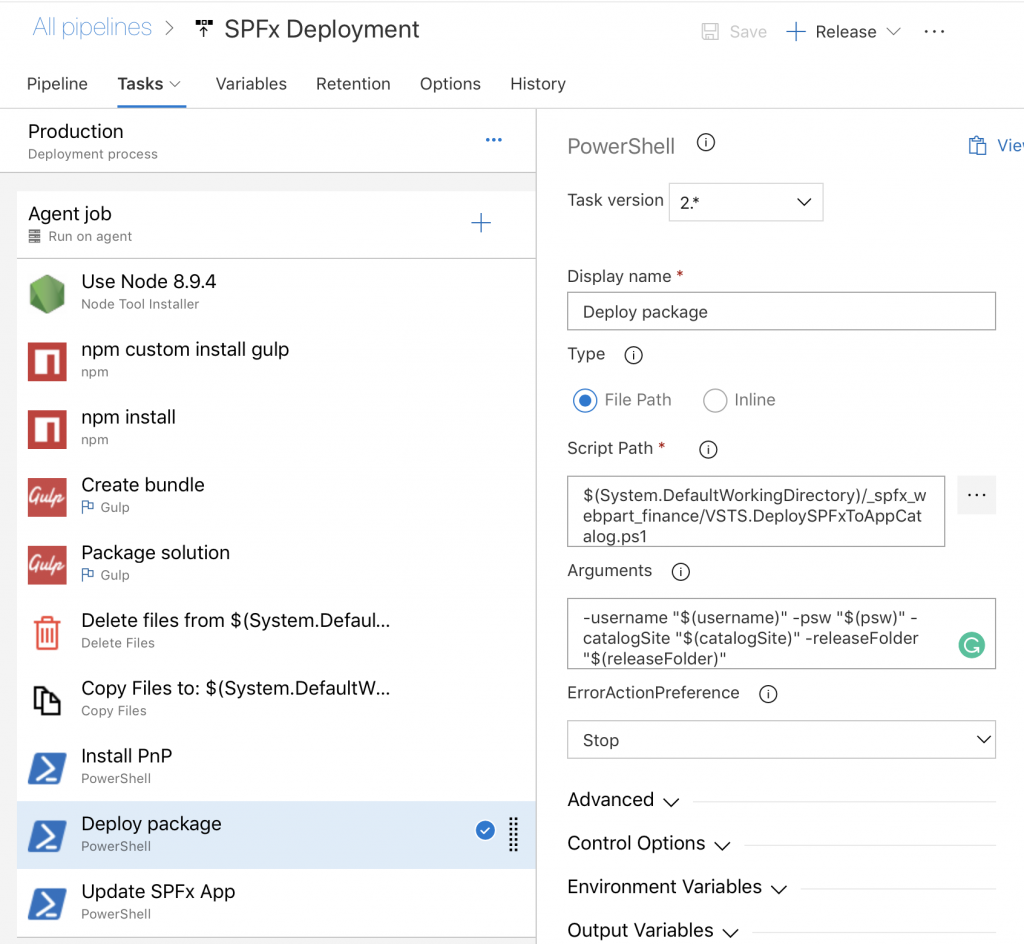
17. Task «PowerShell» – Deploy package:
18. Task «PowerShell» – Update SPFx App:
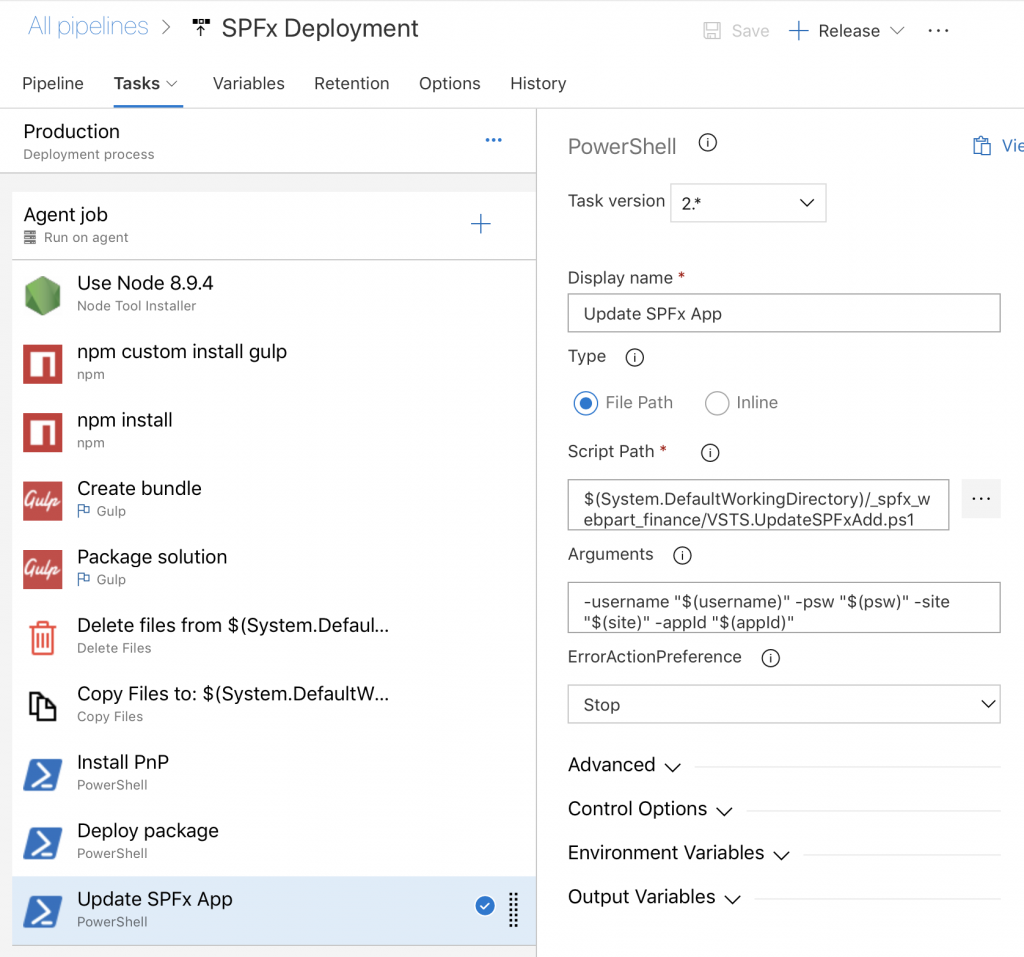
So all tasks are now added in the stage.
19. The last step is to add some variables:
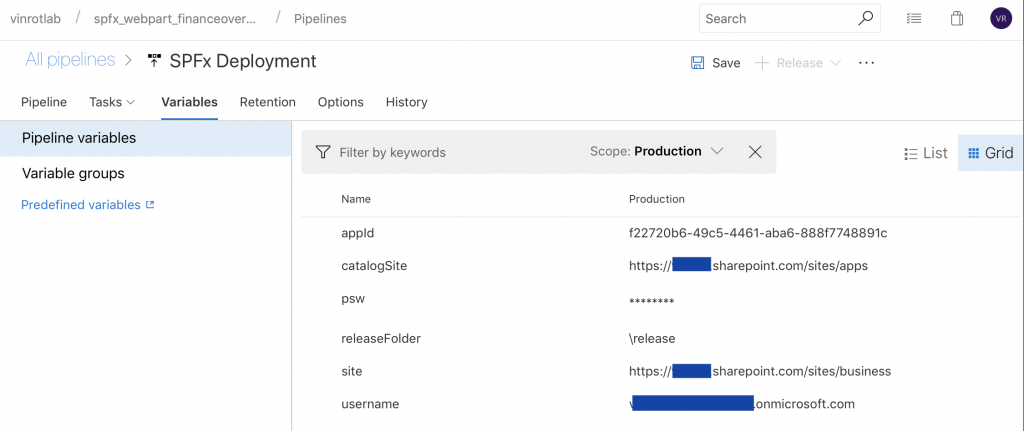
I used with a deployment account of Office 365 and this is site collection admin for SharePoint App Catalog and other site collection for updating the web part. A variable «psw» means the password for the username.
3. Run deployment
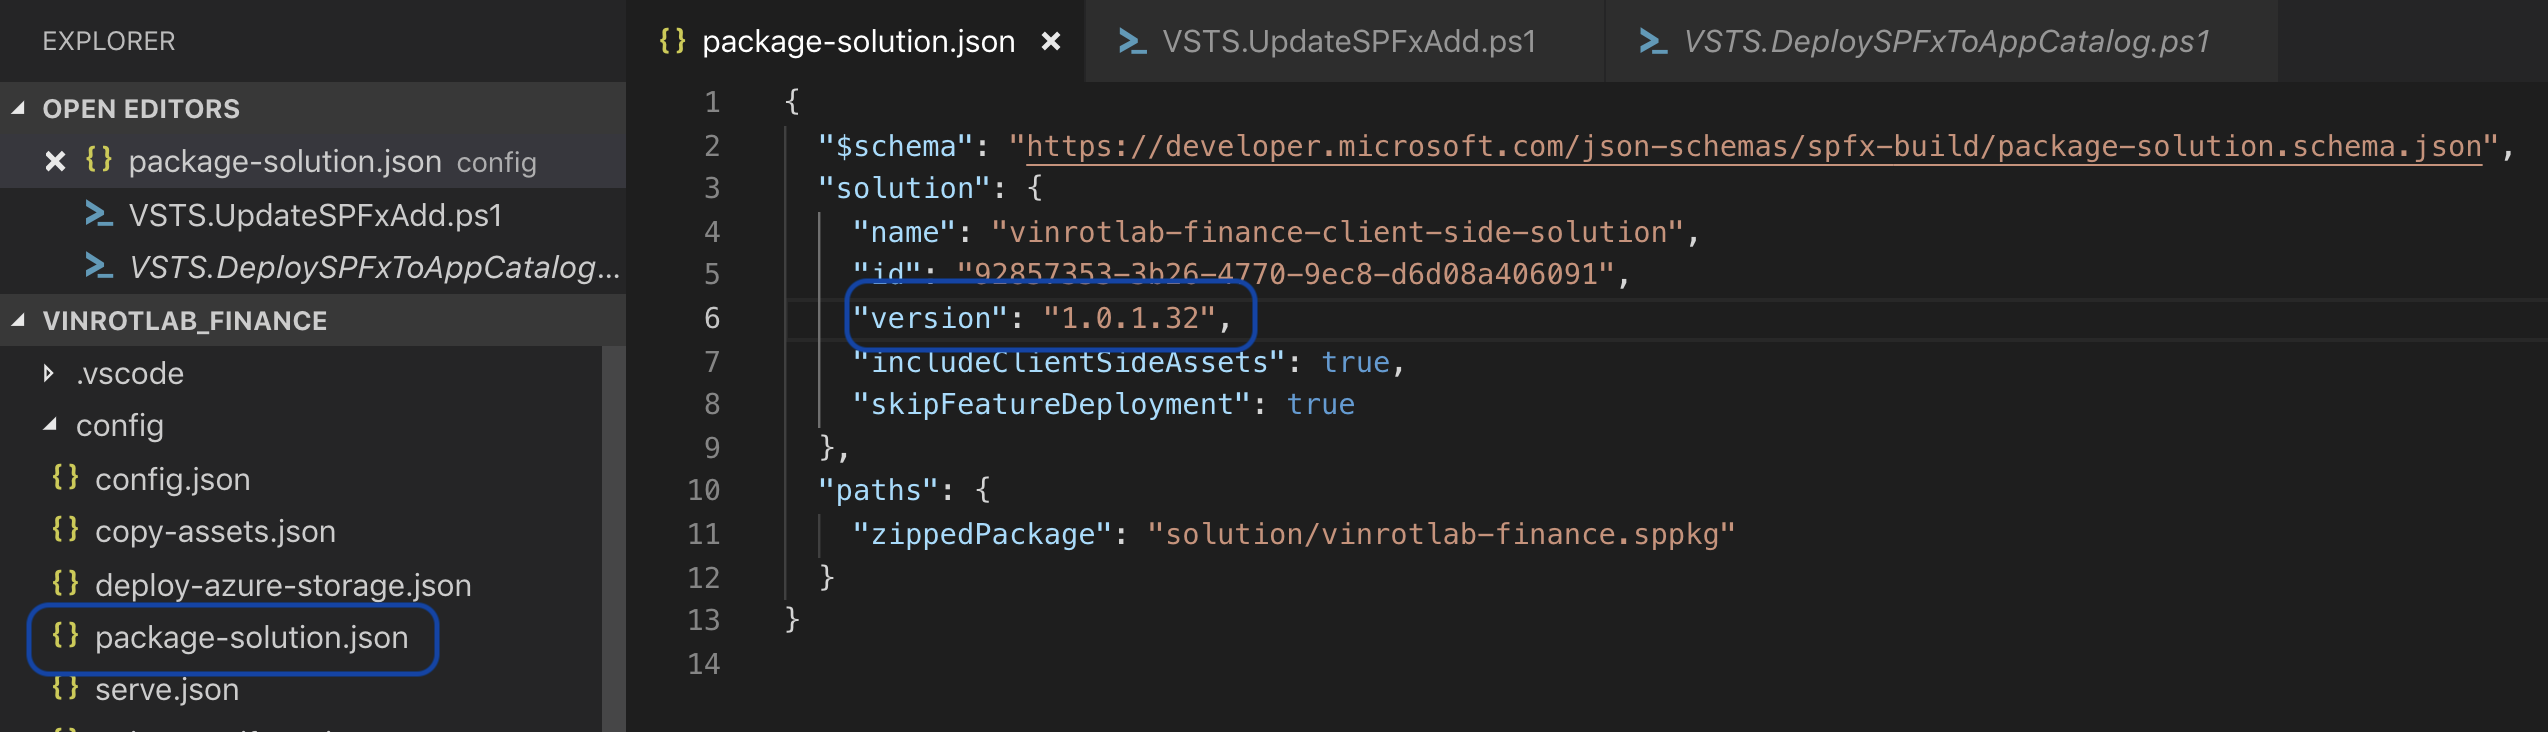
For update the solution and check in to git, increase always the version number.
Go to /config/package-solution.json and increase it.
4. Conclusion
Hopefully, you could set up your continuous delivery on Azure DevOps successfully. I’m really very excited about this implementation. For maintainability, it’s very useful, so I don’t have to pay more attention to deployment. For me, it is a must be used for SPFx-development with DevOps.